Worm castings, a natural fertiliser

Written by Ulysse Hay · April 6, 2026
Lombricompost destiné à la fertilisation des cultures

Every day, we produce organic waste that ends up in the bin without us really thinking about it. Peelings, coffee grounds, food scraps : these materials are actually a valuable resource. Vermicompost transforms them into a highly concentrated natural fertilizer, thanks to the silent work of earthworms. Here's everything you need to know to understand, make, and use vermicompost at home.

What exactly is vermicompost ?

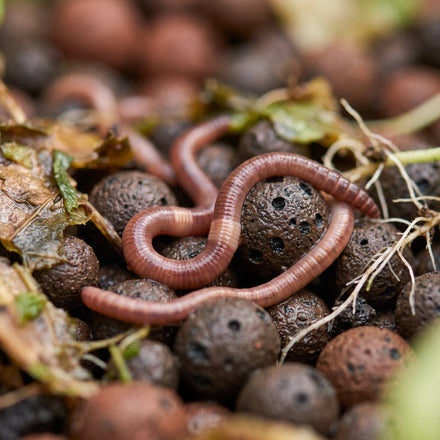
Vermicompost is the result of the transformation of organic matter by specific earthworms, primarily the red wiggler (Eisenia fetida), also known as the manure worm or tiger worm. These worms ingest organic waste, digest it, and produce an amendment of exceptional nutritional richness for plants. This process is called vermicomposting, and it takes place in a specially designed bin called a vermicomposter.

What distinguishes vermicompost from traditional compost is primarily its concentration of nutrients, its fine and homogeneous texture, and the almost complete absence of odor when the system is well managed. It is a living product, rich in beneficial bacteria, enzymes, and humic acids, which not only improves plant nutrition but also soil structure.

The earthworm, an unsuspected ally

The earthworm, an unsung hero

The earthworm is one of the most useful organisms on the planet, and one of the most unappreciated. In its natural environment, it spends its life ingesting decomposing organic matter, transforming it, and enriching the soil with its excretions, called castings. These castings are naturally rich in nitrogen, phosphorus, potassium, and calcium, in forms directly assimilable by plant roots.

In a vermicomposter, the process is the same, but concentrated and accelerated. The worms used in vermicomposting are not ordinary garden worms. They are epigeic worms, which live on the surface and in the upper layers of the soil, particularly adapted to the rapid decomposition of fresh organic matter. Eisenia fetida is the most commonly used species : it is voracious, productive, resistant to varying conditions, and reproduces easily. A well-established population can process several hundred grams of waste per day.

Worm castings and traditional compost: what really sets them apart

Many people confuse worm castings with compost. Both are natural amendments produced from the breakdown of organic matter, but their production method, composition, and uses differ considerably.

Traditional compost is produced through microbial fermentation, a process that generates heat and typically requires a large volume of material, an outdoor space, and several months of patience before you end up with something usable. Worm castings, on the other hand, are produced within a few weeks, at room temperature, in a modest-sized bin that fits perfectly in a kitchen, on a balcony, or in a garage. They are far richer in directly available nutrients than traditional compost, which is why you apply them in much smaller quantities. The texture is fine, uniform, and lump-free — not unlike a premium potting compost. And contrary to popular belief, a well-managed wormery produces virtually no odour.

A natural fertiliser with exceptional properties

Worm castings are often called the black gold of the garden, and that reputation is well earned. Their composition makes them one of the most complete amendments available: they supply nitrogen for leaf growth, phosphorus for root and flower development, potassium for plant resilience, and a broad range of trace elements in highly bioavailable forms.

What makes worm castings truly exceptional is what they contribute beyond nutrients. They are packed with beneficial bacteria that enrich the microbial life of the soil, enzymes that help roots absorb nutrients more efficiently, and humic acids that improve the structure of the grow medium and its water-retention capacity. In other words, they do not simply feed the plants — they feed the soil in which those plants grow. And a living soil produces more vigorous plants, more resistant to disease, and more productive.

How does a wormery work?

A wormery is a bin, typically made up of several stacked trays, in which the worms live and work. The operating principle is straightforward: organic waste is placed in the top tray, the worms gradually break it down, and the finished castings accumulate in the lower trays, ready to harvest.

The bottom tray is fitted with a tap for collecting the worm leachate, also known as worm tea. This brown liquid, which should be diluted generously in water before use — recommendations range from one part leachate to ten parts water, or even greater dilutions — makes a remarkably effective natural liquid fertiliser for watering potted plants or the garden. Nothing goes to waste: the worms transform your organic scraps into solid fertiliser and liquid fertiliser at the same time. A standard-sized wormery can process the organic waste of a household of two to four people, and produce enough castings to maintain a vegetable patch, potted plants, or a small decoupled aquaponic system.

What waste can you put in a wormery?

What waste can be put in a worm composter ?

Worms don't eat everything, and understanding what they do enjoy is key to a well-functioning vermicomposter. Generally, anything from the kitchen that decomposes easily is suitable for them : fruit and vegetable peels, coffee grounds and paper filters, tea bags, stale bread, crushed eggshells, cooked meal leftovers without excessive salt or sauce, dead leaves, and uncoated newspaper torn into small pieces.

It's important to vary the input to maintain a balance between wet and dry materials. A vermicomposter that receives too much wet material without dry material is at risk of becoming acidic and too compact, which stresses the worms. A ratio of approximately two-thirds wet material to one-third dry material is a good starting point. It's better to add waste in small, regular amounts rather than a large quantity all at once, which promotes homogeneous decomposition and avoids unpleasant odors.

What you should never put in a worm composter

Some waste should be kept out of the worm composter entirely, either because it harms the worms directly or because it throws the system off balance. Meat, fish and dairy products ferment quickly, produce foul odours and attract pests. Large quantities of citrus fruit make the environment overly acidic. Onion, garlic and spices in large amounts irritate the worms and cause them to flee. Fatty materials slow decomposition significantly and create an impermeable barrier.

Diseased plants or those treated with pesticides should also be avoided: worms are living organisms sensitive to chemical substances. Salt, even in small amounts, is toxic to them. A simple rule to avoid mistakes: if the waste could naturally end up in a woodland or garden, it can generally go into the worm composter.

Building your own worm composter

For those who want to get started without an immediate outlay, building your own worm composter is a perfectly accessible option. The simplest version uses two stackable opaque plastic bins: the upper bin, with holes drilled in its base, holds the worms and the waste, while the lower bin collects the valuable worm compost liquid. A starter grow medium made from compost, moistened dead leaves and torn cardboard is all you need to welcome the first worms.

This approach has the merit of being economical and allows you to get to grips with worm composting before investing in a more refined model. It does, however, have obvious limitations: plastic in contact with your waste and your soil, questionable aesthetics, and lower durability. For regular, long-term use, a purpose-built worm composter will always perform better and be more pleasant to use day to day.

Buying a worm composter: what to look for

The choice of worm composter depends above all on your situation and how you intend to use it. There are now solutions designed for every setup, from a city flat to a kitchen garden.

For indoor use, on a balcony or in a kitchen, a terracotta worm composter is a particularly elegant and effective solution. Terracotta, a natural and porous material, regulates moisture inside the bin naturally, which is ideal for the worms. It contains no plastic, produces no odours, and fits perfectly into a well-kept interior. This is precisely what we offer with our indoor terracotta worm composter: a handcrafted object that is compact, functional, and attractive enough to sit comfortably in a kitchen or living space.

For outdoor use, in the garden or on a terrace, the in-ground terracotta worm composter is an exceptionally clever solution. It slots directly into the soil of a kitchen garden or a grow bed, and the worms move freely between the composter and the surrounding earth. Fertiliser is released continuously, directly at the plant roots, with no handling required. Available in several sizes from 1 to 12 litres, it suits all spaces, from a simple balcony planter to a large kitchen garden.

Whatever model you choose, you will need to source the compost worms separately if they are not included in the kit. They are the ones who do all the work.

Our range of worm composters
How do you use worm castings in the garden and in pots?

How to use vermicompost in the garden and in pots ?

Worm castings are used in much smaller quantities than conventional compost, precisely because of their high nutrient concentration. In pots or planters, one or two handfuls of worm castings mixed into the compost at the time of repotting or seedling stage are sufficient. For established plants, a thin layer spread on the surface around the base — without burying it — will allow watering to gradually carry nutrients down to the roots.

In the garden, a surface application of two to three centimetres is enough to enrich the soil before planting. Worm leachate, diluted generously in unchlorinated water, can be used directly as a watering solution or as a foliar spray. As with any concentrated fertiliser, excessive application can damage roots. The golden rule with worm castings is restraint: less, but better.

Beginner mistakes to avoid

The first mistake is adding too much waste too quickly at the start. Worms need time to settle in, acclimatise, and reproduce. During the first few weeks, it is better to add small quantities and observe their behaviour. If waste accumulates without being consumed, it means the worm population is not yet large enough, or that the environment is out of balance.

The second mistake is allowing the worm composter to become too wet. A waterlogged environment lacks oxygen, which stresses the worms and generates odours. If the contents of the bin appear too wet, add torn cardboard or dry leaves and temporarily reduce wet inputs.

The third mistake concerns temperature. Worms work best between 19 and 29 degrees. Below 10 degrees, their activity slows considerably. Above 30 degrees, they suffer and may die. In winter, it is advisable to bring the worm composter indoors. In summer, it should be kept in the shade, with regular checks on the moisture level of the medium.

Vermicomposting and aquaponics : a combination that makes sense

Vermicomposting and aquaponics : a combination that makes sense

The link between vermicompost and aquaponics is less obvious at first glance, but it is real and particularly relevant for aquaponists seeking complete autonomy. In an aquaponics system, plants are fed by fish waste transformed by bacteria. However, certain nutrients, particularly iron, calcium, and some trace elements, may be lacking in the long term in a closed system.

Vermitea, diluted in water, can be used occasionally as a natural mineral supplement in certain decoupled aquaponics systems, with caution and in small quantities, to enrich the water with trace elements without disrupting the biological cycle. Furthermore, the compost worms themselves can serve as a living dietary supplement for certain omnivorous fish species raised in aquaponics, such as percids or salmonids. This creates an additional virtuous cycle : kitchen waste feeds the worms, the worms enrich the water and feed the fish, and the fish feed the plants.

Conclusion : vermicomposting, a habit that changes everything

Adopting vermicomposting means changing your perspective on waste. What used to go into the trash every week becomes a resource. What used to be a cost for commercial fertilizers becomes free and produced at home. And this daily act of putting your peelings in the bin is part of a larger logic : consume less, produce better, close cycles.

Whether you have a garden, a balcony, or a few potted plants, vermicomposting has a place in your home. And if you practice aquaponics, it becomes a natural complement to your system, perfectly consistent with the values that led you to this practice. Your plants will thank you, and your trash will be a little lighter.

Sources

Oklahoma State University Extension, The Basics of Vermicomposting, Maximum worm growth between 19 and 29 °C, substrate moisture levels, and biomass doubling time.

University of California Master Gardeners, Putting Worm Castings To Use, Worm castings far richer than standard compost, reduced application rates and worm tea dilution.

New Mexico State University, Guide H-164, Vermicomposting, Tank sizing, worm density, maximum bed depth, and the time to the first harvest.

Eck et al., Exploring Bacterial Communities and Nutrient Cycles in Aquaponics, Springer 2019, Elements that become depleted in a closed-loop system and that an external input can replenish.

Goddek et al., Challenges of Sustainable and Commercial Aquaponics, Sustainability 2015, Variability of phosphorus in aquaponics and the benefits of decoupled systems

New Mexico State University, Circular 680, Water Quality for Aquaculture and Aquaponics, Effect of an organic load on oxygen and ammonia nitrogen in the pond

Frequently asked questions

Sizing should be worked out from your waste output, not from the bin. University vermicomposting guides offer a simple rule of thumb: roughly one tenth of a square metre of bin surface area per half-kilogram of waste produced each week. A household generating two kilograms of peelings per week should therefore aim for around four tenths of a square metre — which remains very modest.

Population density follows the same logic. Allow approximately 500 worms per 28 litres of usable volume, and around 900 grams of worms — roughly two thousand breeding individuals — to process half a kilogram of waste within twenty-four hours. Another point beginners often overlook: depth should not exceed 20 to 30 centimetres, otherwise the bottom compacts, loses its oxygen, and turns anaerobic.

The good news is that you do not need to buy the target population outright. An established colony doubles its mass in approximately sixty days, which means you can start small and let the system calibrate itself to your actual waste output.

Allow two to three months before the first harvest, giving the bedding time to break down and the worms time to colonise the whole bin. There is no point rushing things.

These are almost always fungus gnats, harmless to the worms, but a sign that sugary waste is being left exposed to the air. Four steps are usually enough.

  • Always bury additions beneath the bedding rather than leaving them on the surface.
  • Cover everything with a layer of dampened brown cardboard, which blocks access for egg-laying.
  • Stop adding very sugary fruit for one to two weeks.
  • Rebalance with dry material if the bedding feels waterlogged.

Populations collapse on their own once the sugary food source is removed, with no treatment needed.

Yes, without any difficulty. The worms consume their bedding once fresh inputs stop, so an absence of several weeks poses no problem for them. Load the bin normally before you leave — without overloading it — and cover with a good thick layer of dampened cardboard.

The real risk is thermal, not nutritional. Worm activity is at its peak in a range of roughly 19 to 29 degrees, with the medium kept at around 70 to 85 per cent humidity. A bin left in full summer sun will dry out and overheat within a few days, killing the colony far more surely than starvation would.

No, and this is an important safety point. Worm leachate is a living organic load. Poured into a pond, it consumes oxygen as it breaks down, clouds the water, and can release ammonia at precisely the moment your fish need it least.

Its sensible use is on the plant side — applied to a decoupled grow bed or your pots — never upstream of the fish. The real value lies elsewhere. Published data shows phosphorus levels vary greatly from one aquaponic system to another, typically in the range of 1 to 17 mg/L, and that is precisely the kind of element an external organic input can supplement, in a separate circuit.

It is strongly inadvisable in a coupled system. An aquaponic grow medium is continuously flushed by the water returning to the fish, so anything you add to the bed ends up in the pond. Worm castings would release fine particles that clog the grow medium, along with an organic load that the biofilter is not designed to handle.

In a decoupled bed, where the solution is not recirculated back to the fish, the question is a different one and a small incorporation may be feasible. The boundary to bear in mind is therefore hydraulic rather than chemical — it all depends on whether the water returns to the fish or not.

Read next

L'aquaponie dans les institutions publiques

L'aquaponie dans les institutions publiques

L'aquaponie n'est plus l'apanage des particuliers ou des entreprises, elle pousse aujourd'hui sa course jusque dans les couloirs des hôpitaux, les ateliers des lycées professionnels, les cours des EHPAD et même les cours d'établissements

Read the article
Aquaponie et collectivités françaises

Aquaponie et collectivités françaises

L'aquaponie n'est plus l'apanage des particuliers ou des start-up innvoantes, elle s'installe désormais dans les écoles communales et les jardins partagés. Pour les collectivités, c'est devenu un outil au croisement de l'alimentation, de la

Read the article
Auxiliaires contre les nuisibles

Auxiliaires contre les nuisibles

En aquaponie, les poissons et les plantes partagent la même eau, ce qui rend la plupart des insecticides inutilisables. Les auxiliaires, ces insectes et acariens prédateurs ou parasitoïdes, deviennent alors la seule stratégie vraiment

Read the article
Aquaponics in businesses and schools

Aquaponics in businesses and schools

We picture aquaponics in a garden or a greenhouse. Rarely in a school playground, a hospital's shared garden or the lobby of a corporate headquarters. And yet, that is where it produces some of

Read the article
Lettuce bolting

Lettuce bolting

Your aquaponic lettuces suddenly start bolting upwards, their leaves turn bitter, and a flower stalk appears : this is bolting, an almost systematic phenomenon in July and August. Good news, understanding its three causes

Read the article
Aquaponics and Summer Holidays

Aquaponics and Summer Holidays

You're going away for two weeks in July and your aquaponics system will be running without you : this thought rightly makes you anxious, because heatwaves, evaporation, and fish feeding raise practical questions. Good

Read the article